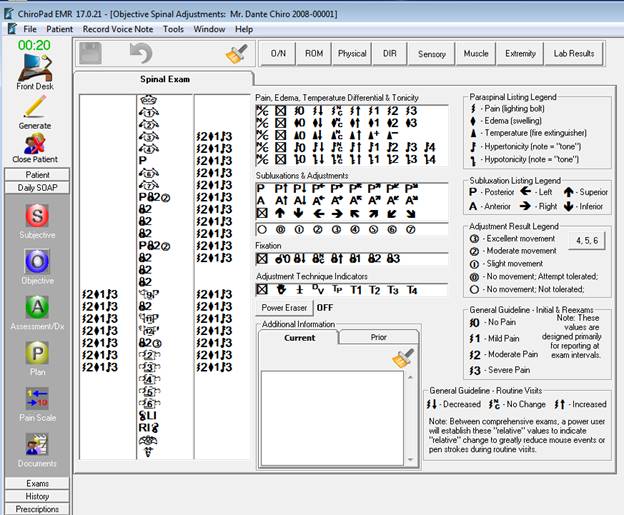
Once the patient file is open, click on the Objective icon in the left Button Bar. In the Objective window (figure 1), there are several screens, divided into button and tab sections. By default, clicking on the Objective icon opens to the Spinal Exam window. The buttons for the other Objective Findings windows are visible at the top of the screen.
Figure 1
The entries on this window, and on all the Objective windows, represent and document the doctor’s findings. These are NOT patient complaints. On the left side of the screen is a spine in a central column, with 2 other columns, one on either side. In the middle section of the window are 4 Findings boxes with assorted symbols, the Power Eraser button, and the Additional Information text box. The right side of the screen displays the symbols with their meanings so that no one need worry about forgetting what the symbols represent. At the top are the buttons that open the various other Objective examination areas.
Note that selecting the * on any line of these findings will either delete that finding from the spinal display, or will make sure that nothing is displayed for that finding when the spinal level is clicked. The * should be used to remove findings as the patient improves, or to remove an incorrect entry. Some doctors use it during data entry to insure that an incorrect selection is NOT done.