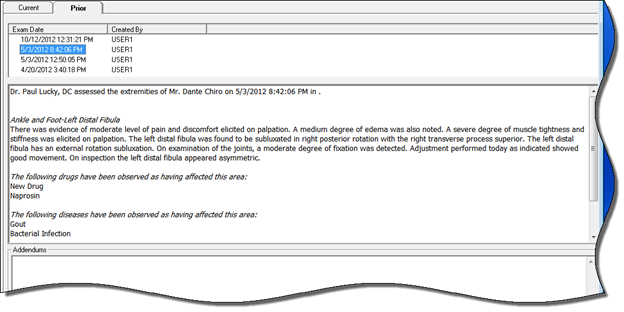
View and/or Print the saved or past Extremity Exam by clicking on the Prior Tab (figure 65). When the Prior Tab opens, all the Extremity Exam items that have previously been saved, even from a minute ago, will be listed on the left side of the window.
Figure 65
To View a specific Extremity Exam, click on its Date to highlight it. The Extremity Exam will be displayed in the lower box. Scroll through the Extremity Exam to see all its details.
To Print a specific, range or all Extremity Exam Tests, click on the Printer icon on the Prior Tab. A Print Options (figure 66) window will open.
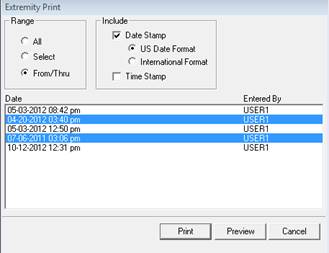
Figure 66
Select the Print option that is needed. The Range Selector enables the printing of a single Extremity Exam , all the Extremity Exam s in a patient file, or just a Range of specific dates.
•All is to print all the Extremity Exam s listed
•Select is to click on a single date and print only that one Extremity Exam
•From/Thru is to click on a start date and end date from the list of Extremity Exam s, and then the only Extremity Exam s that will print are those within the range.
Next, choose the type of Date Stamp format, either the US or International. If either Select or From/Thru was chosen, click on the appropriate date(s). To see the appearance of the Extremity Exam prior to actually printing, click the Preview button. Preview will display on the computer screen the exactly as it will appear on paper. If it is satisfactory, simply click the Printer icon. To Print without checking its appearance, click the Print button.