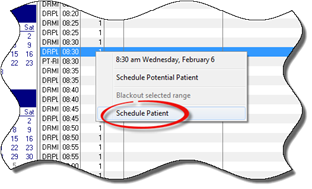
Prior to opening any patient account, simply click on the Appointments icon on the upper left to open the Appointment Scheduler (figure 10). The Appointment Scheduler lines will appear gray and white. Be sure to select the date for the appointment by clicking on that date on the calendar on the left side of the Appointment Scheduler window. Right click directly on the time of the appointment to be scheduled to open a pop-up menu, and select Schedule Patient (figure 11).
Figure 11
The Schedule Appointment Box (figure 12) opens and provides the ability to search for and select the patient for whom the appointment is to be scheduled. The search and selection functions in this box work the same way as the search feature on the Front Desk window. See the section in Chapter 10: Front Desk Operations entitled “Opening a Patient Account” for details.
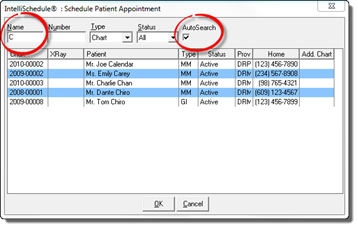
Figure 12
Select the patient with either a single left click and then click OK, or with a double left click. The IntelliSchedule New Appointment window (figure8) opens. Proceed to schedule the appointment as previously described above.