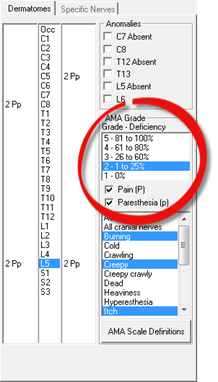
For those that perform Impairment Ratings based on the Guides to the Evaluation of Permanent Impairment published by the American Medical Association, there is the section for Dermatomes and Specific Nerves located on the right side of the window (figure 46). Although the data from both sides of the Sensory Testing screen is displayed in the Selected Findings box on the lower left, the Dermatomes section functions independently from the Tendon Reflex and Manual Stimulation tests.
Figure 46
The Dermatome Tab functions similar to the Spinal Objective window and the Diagnostic Imaging Report (DIR). If the patient has any genetic anomalies, either extra or missing vertebrae, click the appropriate Anomalies check box(es). This will change the Spine and avoid errors. Next, select the AMA Grade that needs to be applied to a specific spinal dermatome level. It is required that the abnormal sensation that the patient is experiencing is also checked, either or both Pain and Paresthesia. When displayed on the Spine, the capital P shows Pain and the lower case P notes Paresthesia. Once Paresthesia is checked, the box listing the types of Paresthesia is activated. Be sure to choose the type(s) of Paresthesia. To multiple select the Paresthesia types, hold the Control Key down while making the selections. Finally, click the Finding on the Spine. If the Finding involves only one side, click in the column adjacent to the spinal level involved. If the Finding is bilateral, click on the spinal level in the middle column.
For those NOT familiar with the AMA Grading Scale, click on the AMA Scale Definitions button. This will open a window that explains the meaning of each grade.
The Specific Nerves Tab rates individual nerves (figure 47), not Dermatomes. Select the nerve to grade, and click on it in the Specific Nerves Tab. Then select the AMA Grade. Be sure to check Pain or Paresthesia or both. If Paresthesia is selected, remember to also enter the type of Paresthesia. For the Specific Nerve section, Left and Right are graded separately.
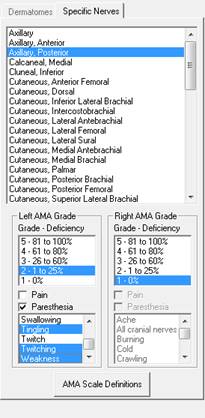
Figure 47
As the Findings are selected, they appear in the Selected Findings box on the lower left (figure 48).
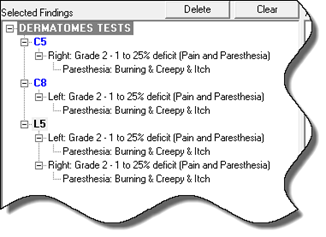
Figure 48
Once all the entries have been made, click on the Save icon at the upper left of the Sensory Test window.
Upon clicking Save, the Sensory Test report (figure 49) will now generate in dictation quality English.
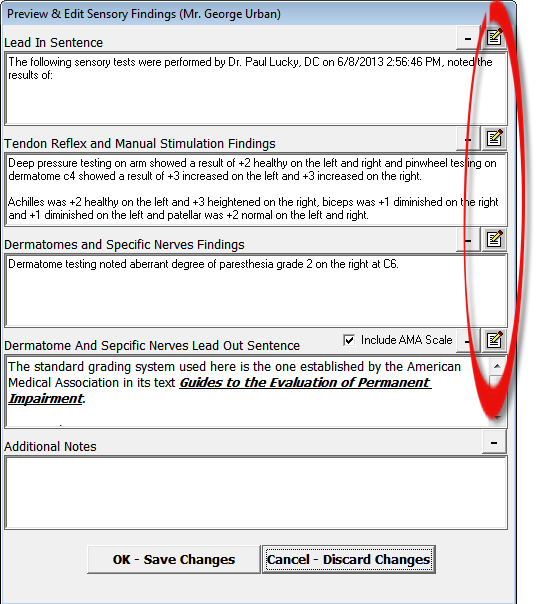
Figure 49
At this point, there is the option to click into the report and edit/modify the entries.
On the right side of each text area is the Text Regeneration  button. For each text section there are
multiple templates. If the one that was generated is NOT the preferred one,
click the Text
Regeneration button to randomize the text.
button. For each text section there are
multiple templates. If the one that was generated is NOT the preferred one,
click the Text
Regeneration button to randomize the text.
There is also the option to enter Additional Information on this window. Data can be entered in this text box (and all other text boxes in ChiroPadEMR) by [1] typing it in, [2] drag and drop in from Paraphrase, [3] copy and paste from word processing programs, [4] dictate using Dragon Naturally Speaking, and [5] writing it on a tablet that has handwriting recognition which converts what was written into typed text.